
XtremeCRM has two ways to put stock into your inventory: a Purchase Order and an Inventory Adjustment. This article explains when to use each one, then walks through entering an Inventory Adjustment step by step.
Which one should I use?
Use a Purchase Order when you buy from a vendor
- You order stock from a vendor such as PetSafe, and there is a cost and a bill to match.
- You want to track what you ordered, what has been received on a packing slip, and what is still on the way.
Purchase Orders have their own article: Create a purchase order.
Use an Inventory Adjustment (Incoming) when stock shows up without a purchase
- Serialized items you have on hand that did not come in on a Purchase Order.
- Correcting your counts after a physical count shows more than XtremeCRM does.
- Entering your starting inventory.
- Items moved to you from another dealer or location outside XtremeCRM.
Use an Inventory Adjustment (Outgoing) when stock leaves without a sale
- Items that are damaged, lost, stolen or thrown away.
- Correcting your counts when XtremeCRM shows more than you really have.
Use neither one for customer returns and warranty replacements
- Customer returns go on that customer's own order as an Incoming line.
- Warranty replacements go on that customer's own order using the Warranty order type, so the replacement and the returned unit stay on the customer's history. See Create a warranty order.
Enter an Inventory Adjustment
Before you start: your account has a customer named Inventory Adjustment. Every Inventory Adjustment goes on that customer, so your real customers' histories stay clean. If you can't find it, contact XtremeCRM support.
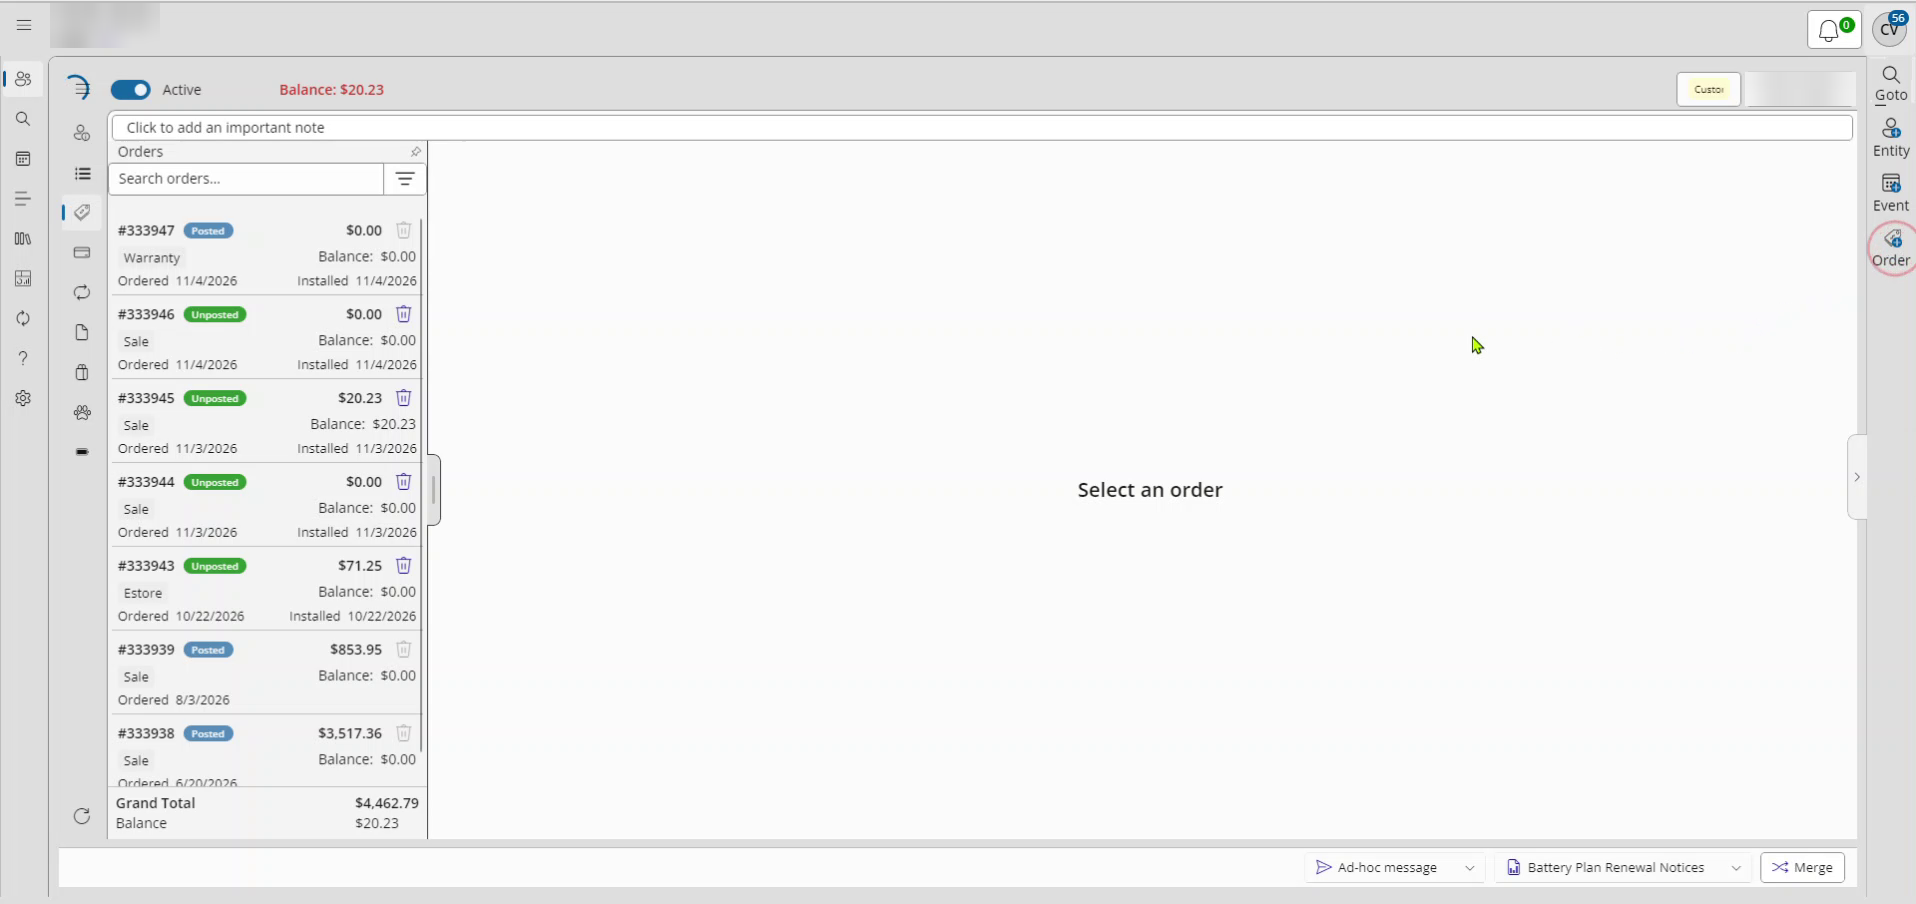
1. Open the Inventory Adjustment customer and start an order
- Search for Inventory Adjustment and open it.
- Click Order in the right-hand tray. The order is created right away as Unposted.
2. Set the order type and inventory location
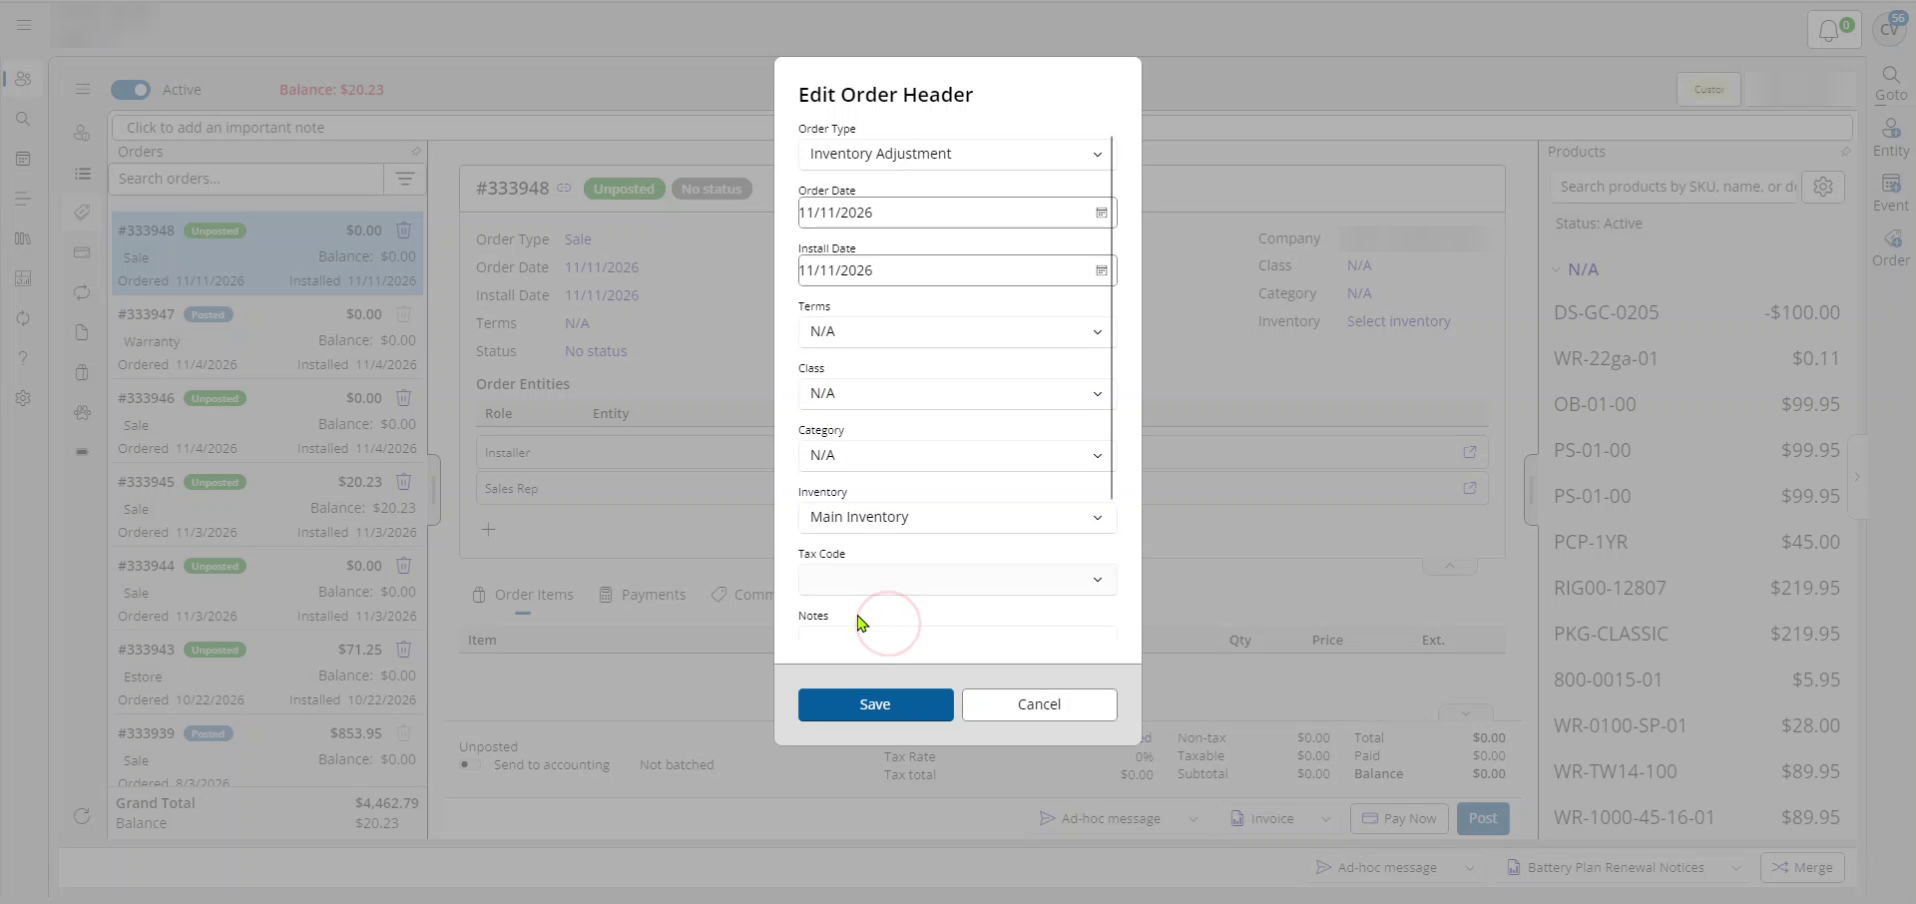
- Click the Order Type link at the top of the order to open Edit Order Header.
- Set Order Type to Inventory Adjustment. Do not pick "Adjustment" or "Battery Adjustment"; those work differently.
- Set Inventory to the location where the stock is (for example, your warehouse or a van).
- Save.
Once the type is Inventory Adjustment, the order shows two sections: Outgoing on top and Incoming below. Prices are always $0.00, and the order does not create a balance.
3. Add the products
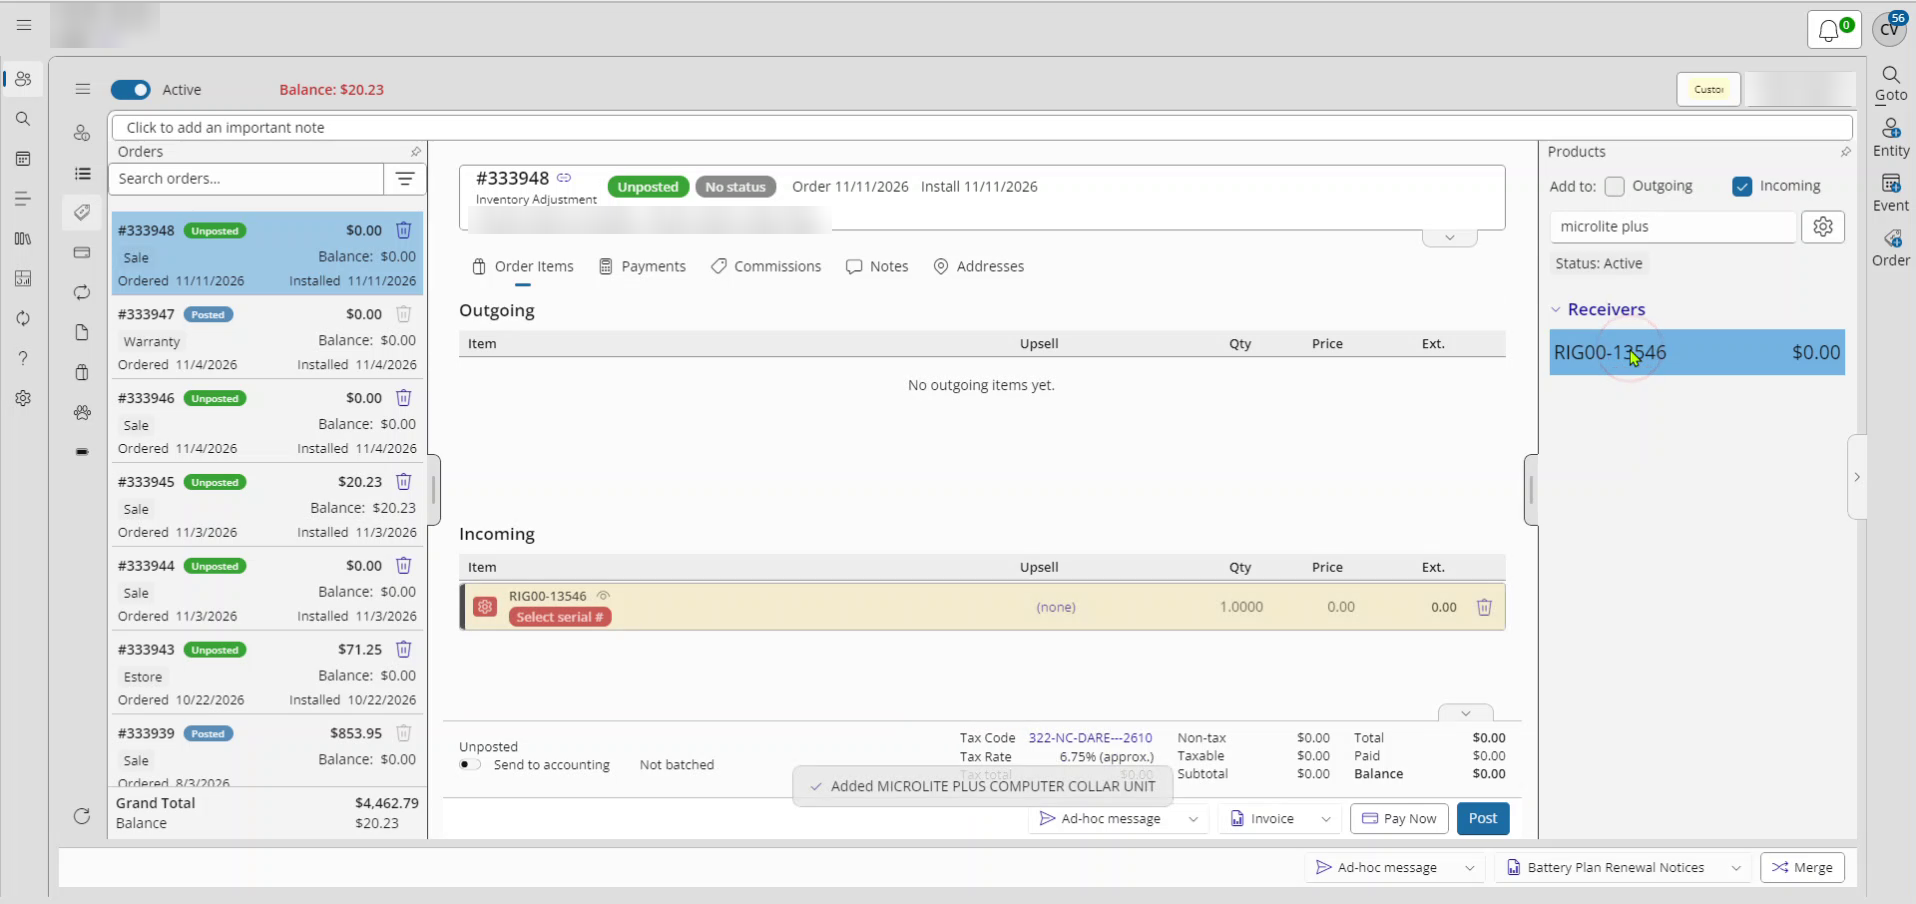
- Open the Products pane.
- Next to Add to:, tick Incoming to add stock, or Outgoing to remove stock. Untick the one you do not want.
- Double-click each product (or select it and press Enter) to add it.
Add serialized items one line per serial number.
4. Fill in the Return details on each Incoming line
Each Incoming line shows a red gear until its details are filled in, and the order cannot be posted until every gear is done.
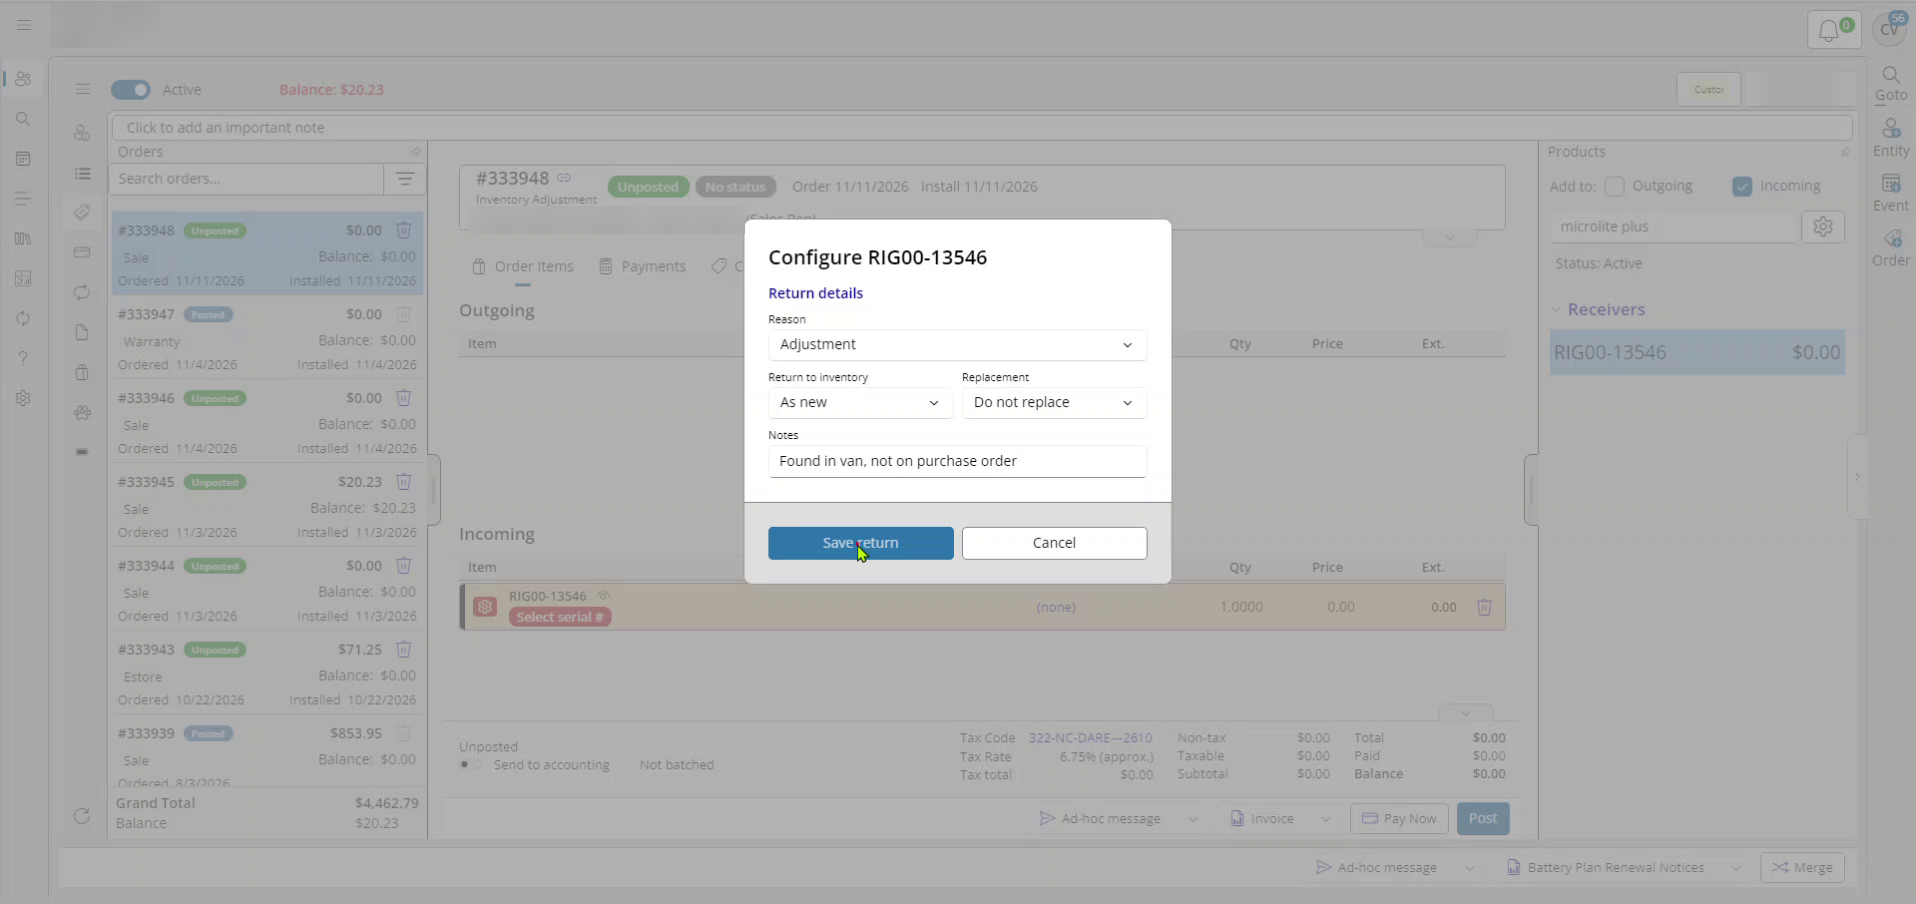
- Click the gear on the line. The Configure window opens on Return details.
- Set Reason to Adjustment.
- Check that Return to inventory says As new (it fills in automatically). Choose As used only if the item is used.
- Notes is optional, for example "Found in van, not on purchase order".
- Click Save return.
5. Enter serial numbers
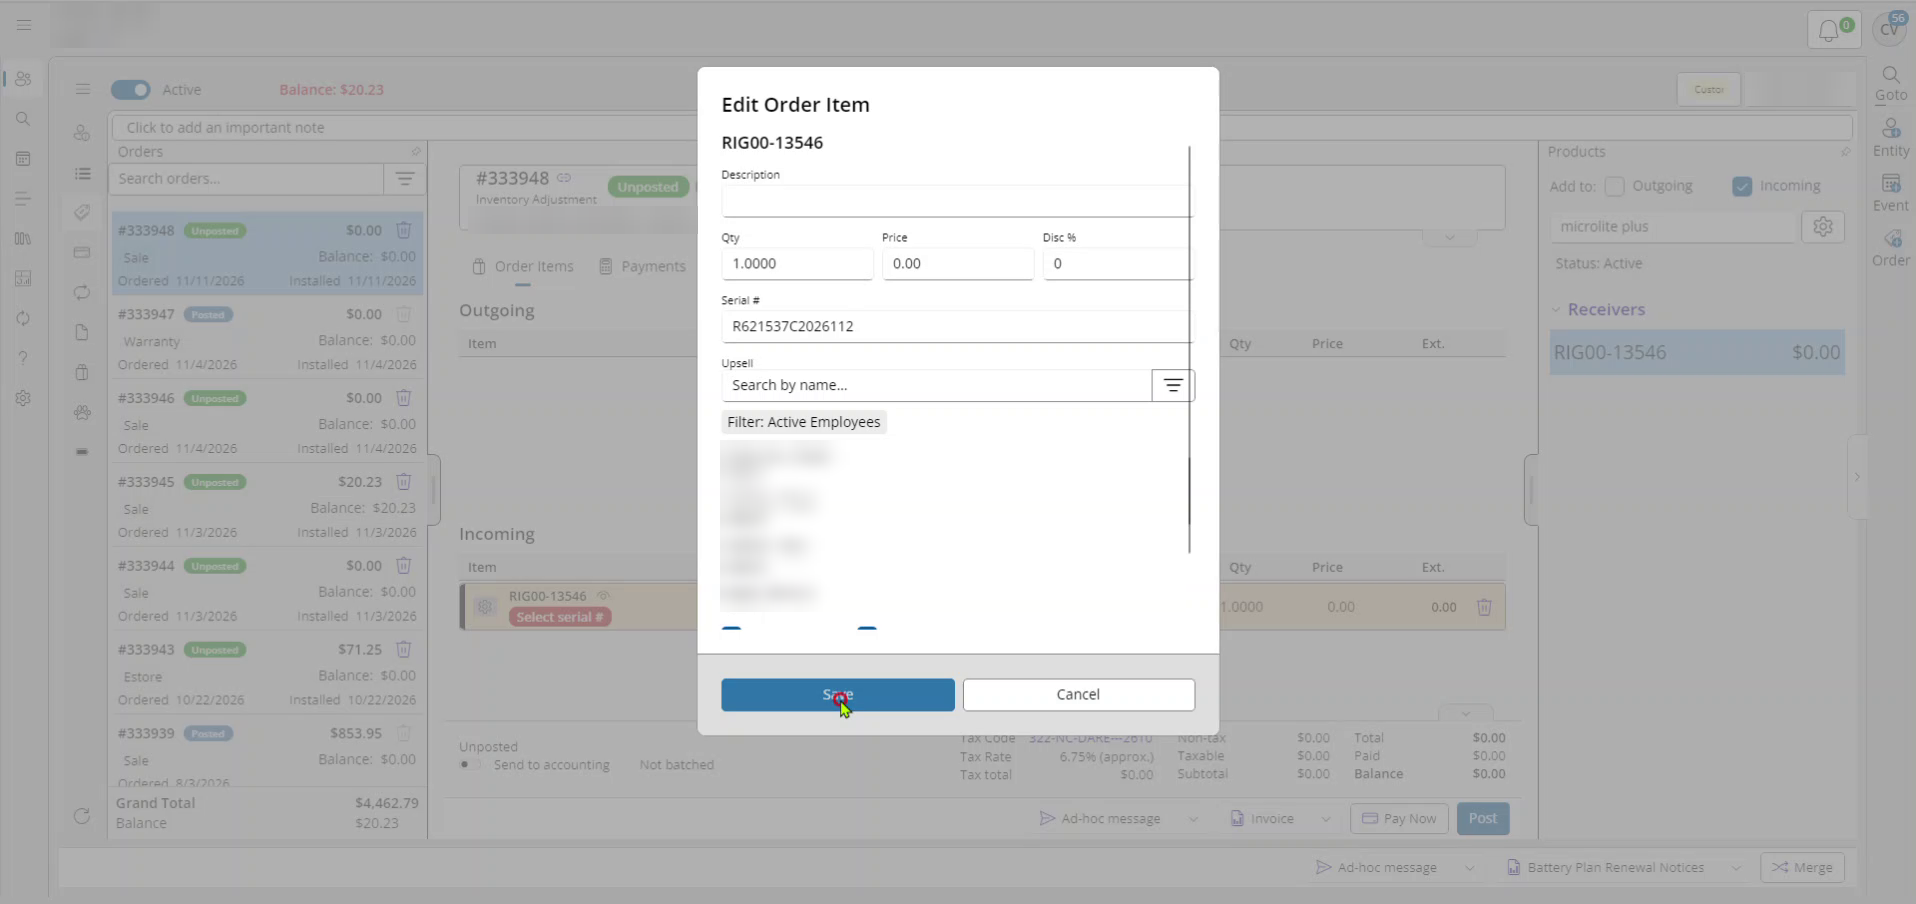
- On each serialized line, click the red Select serial # button. Edit Order Item opens.
- Incoming line: type the serial number in Serial #.
- Outgoing line: pick the serial number from the list. Only serials in stock at that location are offered.
- Click Save.
6. Post the order
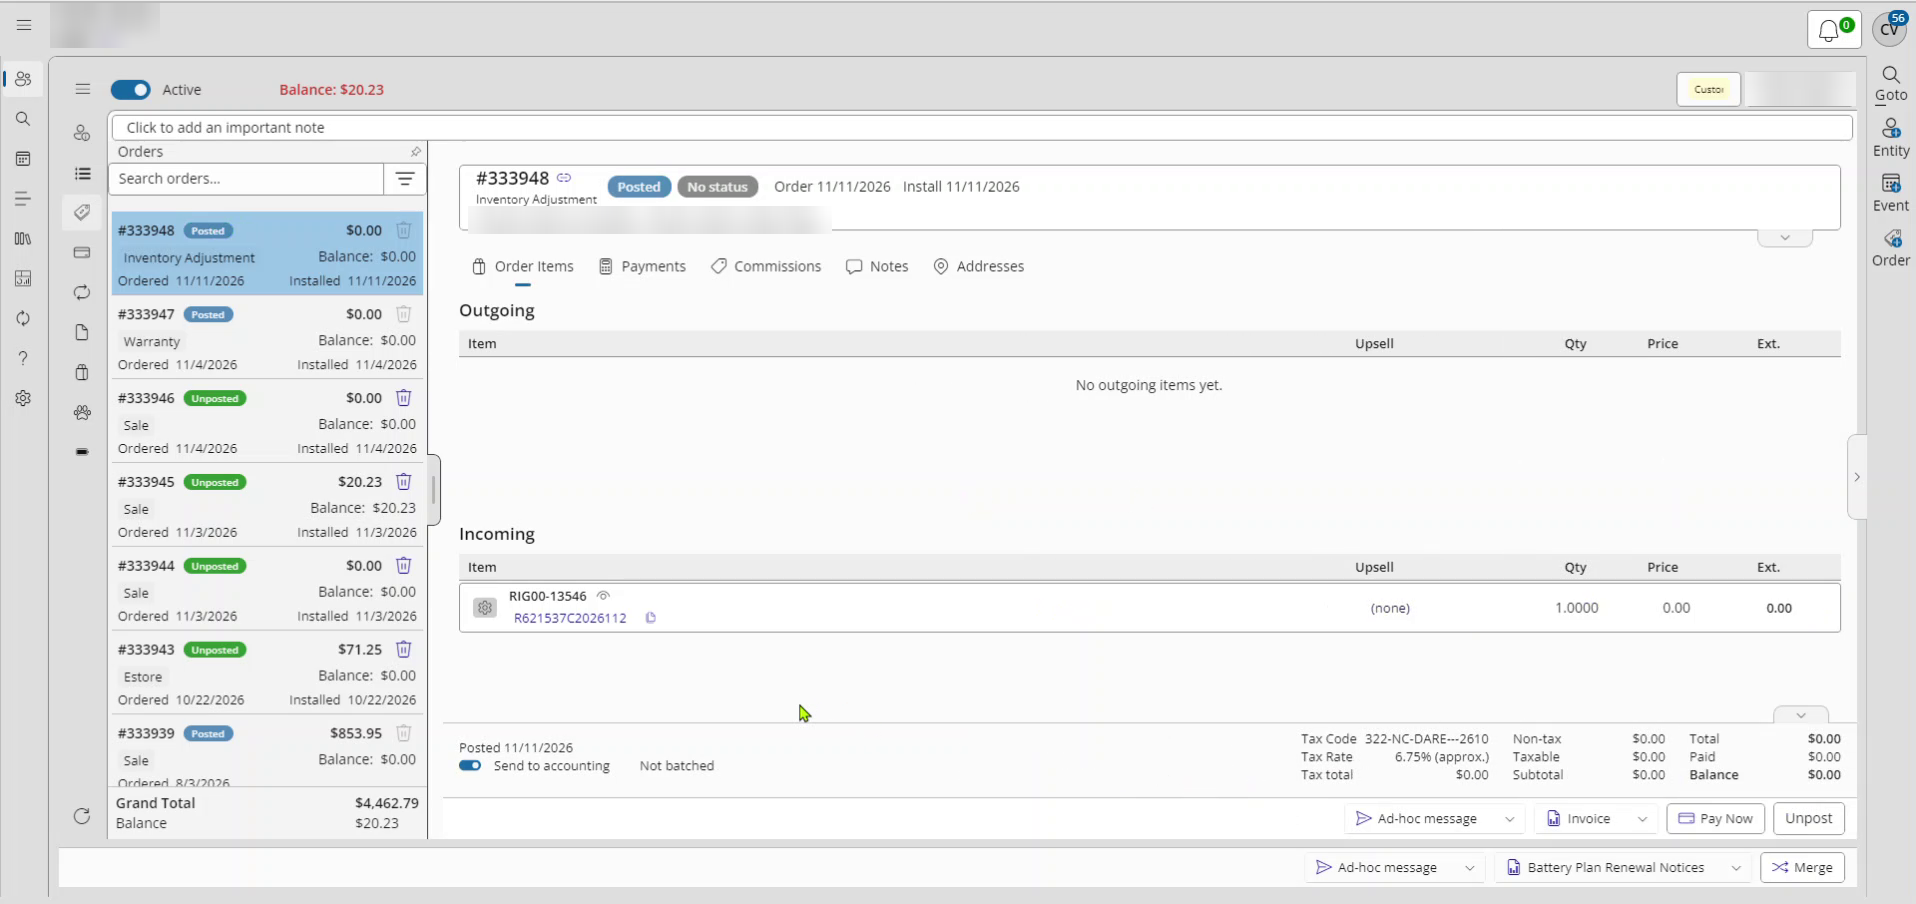
Click Post. Incoming items are added to the inventory location; Outgoing items are removed from it.
If Post is refused, XtremeCRM lists every reason. The usual ones are a missing inventory location, an Incoming line with no Reason (step 4), or a serialized line with no serial number (step 5).
7. Check your inventory
Look up the product in inventory and confirm the quantity, and for serialized items the serial number, now shows at the location you picked.
Good to know
- A posted order is locked. To change it, click Unpost, make the change, then Post again.
- Every Inventory Adjustment stays on the Inventory Adjustment customer's order list, so you can look back at what was added or removed and why.